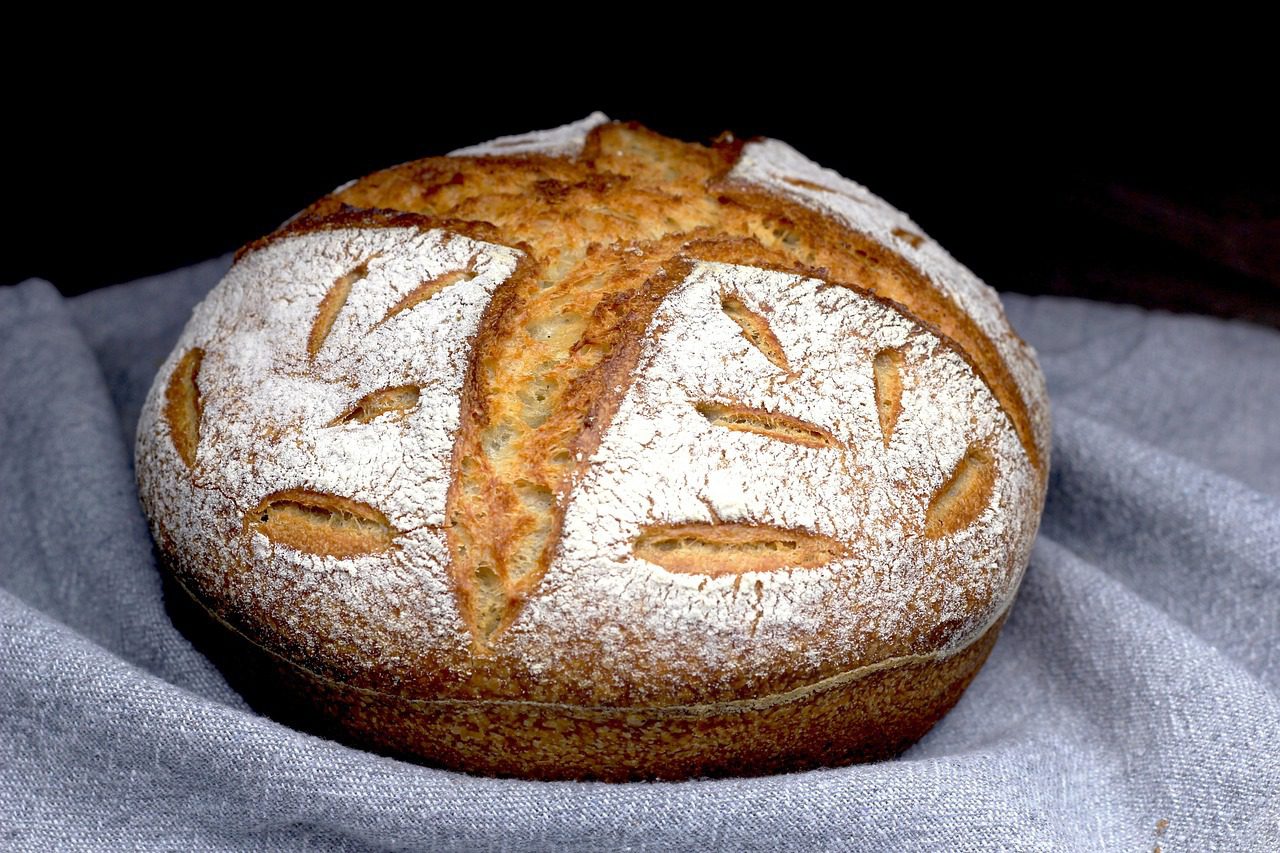
Sourdough bread offers several health benefits, making it a popular choice among bread lovers. I’m using a blend of three flours per the starter recipe since this is gluten free. The recipe is at the end of this post. Thanks for reading and please share if you like the way the starter turns out for you. I will post the bread recipe soon!
[a d] Bob’s Red Mill, Whole Grain Brown Rice Flour, 1. lb.
Amazon creator ad link https://amzn.to/42Zt1mr
[a d] Bob’s Red Mill Stone Ground Sorghum Flour, Non GMO, 22 Ounces (Pack Of 4).
Amazon creator ad link https://amzn.to/4i34nG4
a d] Maskal brand Teff Organic Ivory Teff Flour, 14 Ounce.
Amazon creator ad link https://amzn.to/3CVmxdO
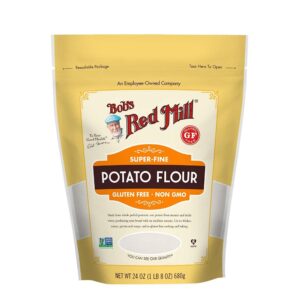
[a d] Bob’s Red Mill Flour Gluten Free Potato, 24 Oz, Pack of 1.
Amazon creator ad link https://amzn.to/4k056tn
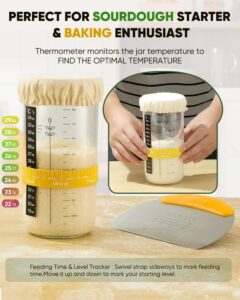
[a d] Sourdough Starter Kit.
Amazon creator ad link https://amzn.to/40V8XPG
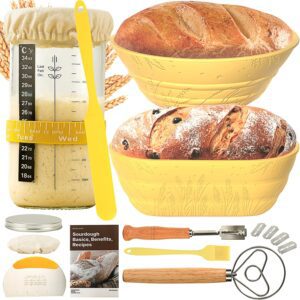
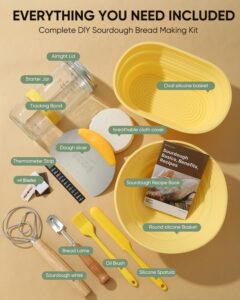
Complete Sourdough Bread Kit – Everything you need for bread baking is included. Get the baking set with a 34 oz Starter Jar Kit, 9” Round Silicone Bread Proofing Basket, 10” Oval Silicone Bread Proofing Basket, Silicone Spatula, Tracking Band, Thermometer Strip, Breathable Cloth Cover, Airtight Aluminum Lid, Dough Slicer, Sourdough Whisk, Sourdough Recipe Book, Bread Lame + 5 Blades, and Oil Brush.
Sourdough Recipe Book Included -Tons of delicious flavors with step-by-step instructions make the bread-making process so much easier and more professional. Bake healthy and flavorful bread with your family and enjoy valuable family and parent-child time!
34 oz Large Capacity Sourdough Starter Kit – At 34 oz, this sourdough kit is ideal for making up to 4-5 loaves of bread. Elastic bands marked with days indicate feeding times and sourdough levels, so you never forget the last time you fed your starter.
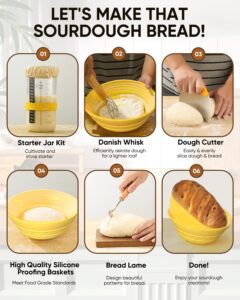
Easy to Clean & Machine Washable – Our bread proofing basket is made from premium flexible silicone material. Compared with traditional baskets, which can stink and darken over time, our silicone proofing basket is odor-proof and machine washable, making cleanup effortless. The heat-resistant silicone material can be used directly in the oven.
Foldable Design & Easy to Store – The surface of the silicone sourdough proofing basket is delicately designed with a wheat texture. It’s not just for sourdough bread—you can also use the silicone baskets to hold bread, fruits, salads, snacks, and more. The foldable design makes the proofing basket easier to carry and store, making it a versatile and practical tool for everyday use.
Got a Family Gathering Coming Up? – This sourdough bread baking kit makes the bread-making process so much easier and helps your sourdough bread look like it came from a professional bakery. It’s perfect for stealing the show at big family gatherings and occasions. The kit isn’t just for sourdough; you can use it for other recipes and ingredients too. The spatula, whisk, and basket are handy in more ways than one.
Here are some key benefits:
-
Easier to Digest: The fermentation process in sourdough bread helps break down gluten, which can make it easier to digest compared to regular bread. The naturally occurring lactobacilli (beneficial bacteria) in sourdough also aid in digestion.
-
Lower Glycemic Index: Sourdough has a lower glycemic index (GI) compared to most white bread. This means it can help maintain more stable blood sugar levels, which is especially beneficial for people with diabetes or those looking to control their sugar levels.
-
Probiotic Benefits: The fermentation process encourages the growth of beneficial bacteria (probiotics), which can help support a healthy gut microbiome. However, not all sourdough bread retains these probiotics by the time it is baked, but it can still be more beneficial than many other breads.
-
Rich in Nutrients: Sourdough bread can be higher in certain nutrients like B vitamins, iron, magnesium, and zinc due to the fermentation process. The lactic acid bacteria involved in fermentation also help break down phytic acid (a compound found in grains that can inhibit nutrient absorption), making these nutrients more bioavailable.
-
Improved Shelf Life: The acids produced during fermentation (like lactic acid) act as natural preservatives, which helps sourdough bread stay fresh longer compared to regular bread.
-
Reduced Phytate Content: Phytates can bind to minerals like iron and zinc, making them harder for your body to absorb. The fermentation process of sourdough helps reduce phytate content, enhancing mineral absorption.
-
Potentially Lower Gluten Sensitivity: While not gluten-free, some people with mild gluten sensitivities find sourdough bread more tolerable due to the breakdown of gluten during fermentation.
-
Heart Health: Some studies suggest that consuming sourdough can help lower blood cholesterol levels, possibly due to its fiber and nutrient content. The fermentation process may also lower the presence of compounds that could negatively impact cardiovascular health.
While sourdough offers a range of health benefits, it’s still important to be mindful of your overall diet and to choose a sourdough made with whole grains for the most nutrition.
[a d] Bob’s Red Mill, Whole Grain Brown Rice Flour, 1. lb.
Amazon creator ad link https://amzn.to/42Zt1mr
[a d] Bob’s Red Mill Stone Ground Sorghum Flour, Non GMO, 22 Ounces (Pack Of 4).
Amazon creator ad link https://amzn.to/4i34nG4
[a d] Sourdough Starter Kit.
Amazon creator ad link https://amzn.to/40V8XPG
Thanks for reading my blog! Stay tuned for the sourdough bread recipe! Have a great day! Recipe for Sourdough Starter is below.
1. Flour Variety: For a more diverse nutrient profile, I suggest combining flours. You can use 60% brown rice flour, 30% sorghum flour, and 10% teff flour for the added fiber and trace minerals. The variety of grains will help boost the starter’s fermentation process. You can also add a tablespoon of potato flour in the first few days to encourage better initial fermentation, as it’s a starchy flour that promotes healthy microbial growth.
2. Hydration: It’s helpful to adjust the hydration depending on your flour choice. Some gluten-free flours, especially rice flour, can absorb more water. If your starter seems too thick or not bubbly enough, try increasing the water by an extra tablespoon. A thicker starter can slow fermentation, while a looser one helps fermentation speed up.
3. Temperature and Environment: If the environment is cooler, consider moving your starter to a warmer spot, such as near a stove or in an oven with a light on. You can even use a heating mat designed for sourdough starters to keep the temperature in the ideal range (70-75°F or 21-24°C).
4. Adding Probiotic Boosters: To promote healthy fermentation and microbiome balance, you can add a small amount of probiotics, like a pinch of ground flaxseed or a small dose of a quality probiotic capsule (opened and sprinkled into the mix). This can give your starter a diverse microbial base, which is beneficial for digestion.
5. Wild Yeast Activation: To boost the wild yeast in your starter, you can add a small amount of fruit like apples or grapes on Day 1. Simply mash them slightly and add them to the mix. This introduces wild yeasts from the fruit’s skin, which helps the starter culture thrive. Remove the fruit after a couple of days and continue with the flour and water feedings.
6. Optional Sweetener (for better fermentation): Add a small teaspoon of maple syrup or honey (if tolerated by your liver condition) on Day 2 or 3 to encourage wild yeast growth. The sugar serves as food for the yeasts, but it’ll be used up quickly and will not be present in the final starter.
7. Feeding Ratio Adjustments: You can feed your starter more often or with larger amounts if it’s not becoming bubbly fast enough. For example, on Day 3, instead of just discarding half, try feeding with 3-4 tablespoons of flour and water each to boost activity.
8. Check for Tanginess Early: The smell of your starter should start to develop a slight tanginess by Day 3-4. This is normal, but if it gets overly sour or smells off, it may need more regular feedings, or you could switch to a less fermented method.
Sourdough Bread Starter Recipe:
Ingredients:
- 1/4 cup (about 4 tablespoons) Brown Rice Flour
- 1/4 cup (about 4 tablespoons) Sorghum Flour
- 1-2 tablespoons Teff Flour (optional, for added nutrients)
- 1 tablespoon Potato Flour (optional, for initial fermentation boost)
- Filtered or Distilled Water (adjust to consistency)
Equipment:
- Glass jar or BPA-free container (16-32 oz)
- Non-metal spoon or spatula
- Clean cloth or loose-fitting lid
- Heating mat (optional, for temperature control)
Instructions:
Day 1:
- Mix 1/4 cup of your flour blend (1/8 cup Brown Rice Flour, 1/8 cup Sorghum Flour, 1-2 teaspoons Teff Flour) with 1/4 cup of filtered water in a clean jar.
- Stir until smooth, cover loosely with a breathable cloth.
- Place the jar in a warm spot (around 70-75°F). Add mashed fruit or 1 teaspoon maple syrup if desired to encourage yeast growth.
Day 2:
- Check for any bubbling or slight rise. If none, continue to the next step.
- Add 2 tablespoons of flour and 2 tablespoons of filtered water. Stir thoroughly.
- Cover loosely, and let it rest in a warm spot.
Day 3-5:
- Discard half of the mixture, leaving about 1/4 cup in the jar.
- Feed with 2 tablespoons of the same flour blend and 2 tablespoons of filtered water.
- Stir well, cover, and let it rest. By this time, the starter should begin to smell slightly tangy and show signs of bubbling.
Day 6-7:
- If the starter is bubbly and doubling in size about 4-6 hours after feeding, it is ready to use.
- If not fully active, continue daily feedings until it becomes bubbly and stable.
Maintenance:
- For daily use: discard half, feed with equal parts flour and water daily.
- For refrigerated storage: Feed and store in the fridge once the starter is active. Feed weekly.
- Before baking: Reactivate by removing from fridge 1-2 days before, and feed every 12 hours until bubbly and active.
Notes:
- If you notice the starter is sluggish, you can increase the amount of flour and water or add a small pinch of probiotic powder.
- Use a thermometer to ensure the temperature is within the ideal range for fermentation.
- It may take longer (up to 10 days) for the starter to become fully active, especially with gluten-free flours, so be patient.
This should help boost your fermentation process, add more diverse nutrients, and ensure a smoother and more digestive-friendly starter.