
I’d been avoiding it for weeks—my office desk had become a mountain of papers, receipts, and bills that I just couldn’t seem to tackle. It was one of those spaces where I’d shove things out of sight, hoping they would magically organize themselves. But one cold, rainy afternoon, I decided enough was enough.
I pulled up a chair, rolled up my sleeves, and started sorting through the paper clutter. It was a bit overwhelming at first—old bills I had paid months ago, forms I’d never filed, and a random assortment of sticky notes with half-remembered to-dos. Slowly but surely, I sorted through it all, recycling what I didn’t need and setting aside anything I needed to keep.
Step 1: Tackle the Paper Clutter
The first step in organizing any office is tackling the paper clutter. Old bills, receipts, or forms can easily pile up over time, leaving you feeling buried in paper. To avoid the stress of digging through stacks, try implementing the “one-touch rule.” This means handling each paper once: either file it, toss it, or act on it immediately. It’s a simple but effective way to keep paper clutter under control before it gets out of hand.
For papers you need to keep, invest in a file sorter or an inbox tray to keep things organized. I also recommend sorting files into categories like “Tax Documents,” “Bills & Receipts,” and “Important Forms.” If you can, set aside time weekly or monthly to do a “paper audit” to make sure things aren’t piling up again.
Pro Tip: If you have a lot of paper that you don’t need to keep but can’t bear to throw away, scanning and digitizing important documents can save both space and time in the future. There are many apps and tools available that make this process quick and easy, like Adobe Scan or Evernote.
Step 2: Organize Office Supplies
Next, I turned to the office supplies, which were scattered all over. Pens with no caps, paperclips tangled in a mess, and sticky notes piling up in various sizes. After sorting through the chaos, I found that most of it could be easily organized with just a few key tools.
Here are some organizing hacks that helped me streamline my supplies:
- Magnetic Containers: Small magnetic containers or jars are a great way to corral paper clips, push pins, and other small items. Stick them to something metal: the side of your desk or a nearby filing cabinet for easy access.
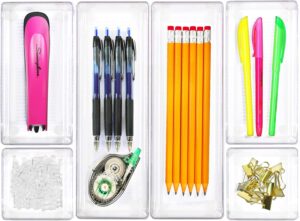
- Drawer Organizers: Drawer dividers or trays keep pens, pencils, and scissors in place. Color-coding these supplies (e.g., using a tray for “writing tools” and one for “paper supplies”) makes it even easier to find what you need.
- Clear Plastic Bins: For a larger amount of supplies, opt for clear bins or baskets so you can quickly see what’s inside.
- Pen Cups: Use a pen cup or holder for all your writing instruments to prevent them from getting lost in the shuffle. Choose one with multiple compartments for even better organization.
Pro Tip: If you have an excess of office supplies (hello, free pens!), consider donating the extras to a local charity or school. It’s a great way to declutter and give back at the same time!
Step 3: Clean Your Workspace
Once the papers were sorted and the supplies were organized, it was time for the real clean-up: the desk itself. I wiped down every surface, including my computer, which had somehow become covered in a layer of dust and fingerprints. The keyboard was especially satisfying to clean—after a quick wipe, it looked brand new again.
Quick Office Cleaning Tips
- Microfiber Cloths: These are great for cleaning your desk, computer, and keyboard without leaving behind lint or scratches.
- Use Compressed Air: A can of compressed air is essential for blasting dust out of hard-to-reach areas on your keyboard or computer vents.
- Disinfect Wipes: Wipe down frequently touched surfaces like your phone, mouse, and desk to help reduce germs and create a cleaner environment.
- Declutter the Top: Keep only the essentials on your desk to avoid visual overload. A clean desk helps increase productivity and focus.
Pro Tip: If you’re working from home, it’s easy to forget the importance of a clean workspace. Regularly cleaning your desk not only improves the physical space but also has a positive impact on your mental clarity and productivity.
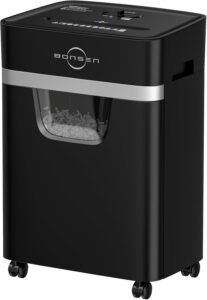
Step 4: Recycle or Shred Unnecessary Documents
Finally, I tackled the last task: shredding the unnecessary documents. I made a nice pile of things that were no longer needed, ran them through the shredder, and just like that, the clutter was gone. The entire office felt lighter, cleaner, and more organized.
Bonus Tip for Paperwork: Keep a “Shred Pile” or “Recycle Pile” nearby when organizing paperwork so you can immediately shred or recycle what’s unnecessary as you go. This prevents another pile-up from occurring down the road.
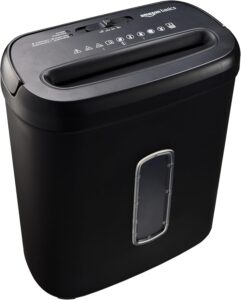
Consider using a shredder with a high capacity if you deal with lots of documents. Some models also offer continuous shredding (meaning you don’t have to stop after a few minutes), saving you valuable time.
By the time I was done, I couldn’t help but feel a sense of accomplishment. I now had a workspace that was calm and functional—and I could finally breathe easy without that pile of papers looming over me. Tackling paper clutter and organizing your desk doesn’t have to be an overwhelming task if you break it down into manageable steps. With the right systems in place, you can maintain a clean, productive workspace all year long.
Are you ready to tackle your desk? If so, I’ve got some product recommendations to make the process even easier:
Office:
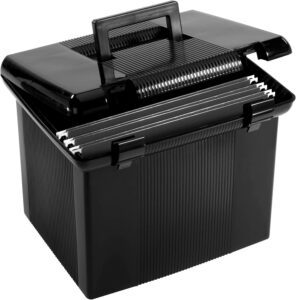
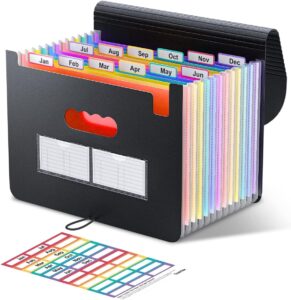
File organizers for sorting paperwork and documents.
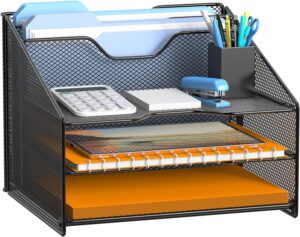
Desk organizer to keep pens, paper, and office supplies in one place.
- file sorter/ inbox tray
- magnetic containers
- drawer organizers
- clear plastic bins or baskets
- pen cups with multi-compartments
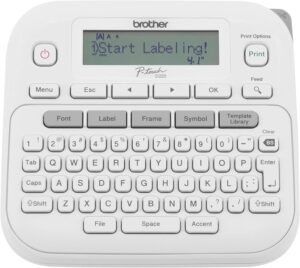
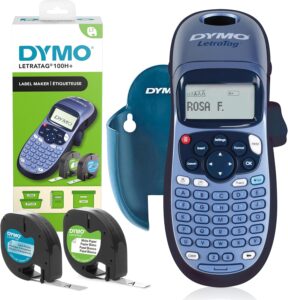
Label makers that are perfect for labeling files and storage boxes.
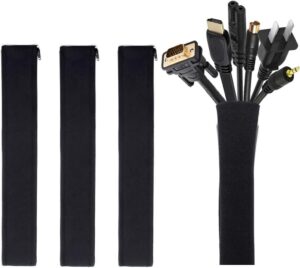
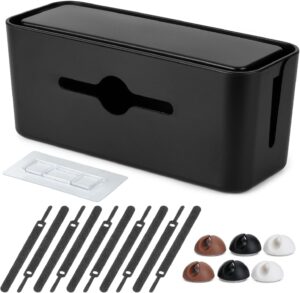
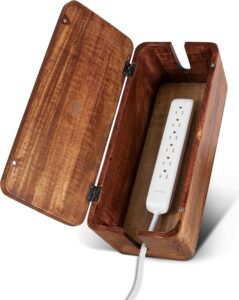
Cable management boxes to tidy up charging cords and cables.


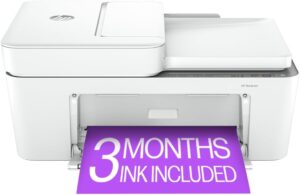
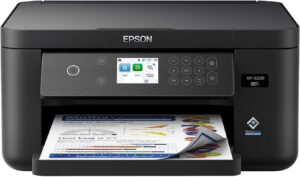
Printer / scanner for digitizing documents and printing copies as needed.
Paper shredder
Cleaning supplies such as spray cleaner, microfiber cloths, disinfecting wipes


In our Week 7 challenge, we will tackle the entryway!
Week 6: Office – Organize Desk & Files
- Sort through paper clutter (files, bills, etc.).
- Organize office supplies (pens, paper, etc.).
- Wipe down desk, computer, and keyboard.
- Recycle or shred unnecessary documents.
These are just some of my product reviews and recommendations.If you’ve been enjoying my reviews and recommendations, I’ve got something special for you! I’ve linked all the awesome products I’ve tried and loved through my affiliate links.
By using these links, not only will you be getting great products, but you’ll also be supporting me so I can keep bringing you honest reviews and top picks.
Treat yourself to amazing products!
My Amazon creator affiliate links are with each product. More cleaning and organizing products coming soon!
Thanks for your support – you all rock!
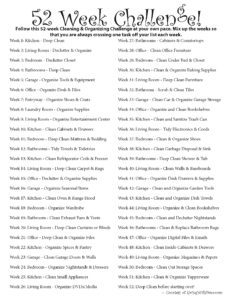
My earlier blog post has the 52-week challenge checklist and some more links!
Download the list here (click image):
Thanks for reading my blog and visiting these product links. Have a great day!